AVI
My website code stuff
Project maintained by Locust0 Hosted on GitHub Pages — Theme by mattgraham
Shader Practice
October 22, 2018
I’ve been learning how to make shaders with unreal by following a few tutorials online. I hope the following can be as useful as they are awesome looking.
Lava
The only animated shader, this shader uses 2 textures: a fire texture and a normal map along with 3 panning coordinates.

Essentially, a small fire texture is a base for the shader. Over that there is a mask which causes the lava to darken in places which correspond to the normal map of the object.
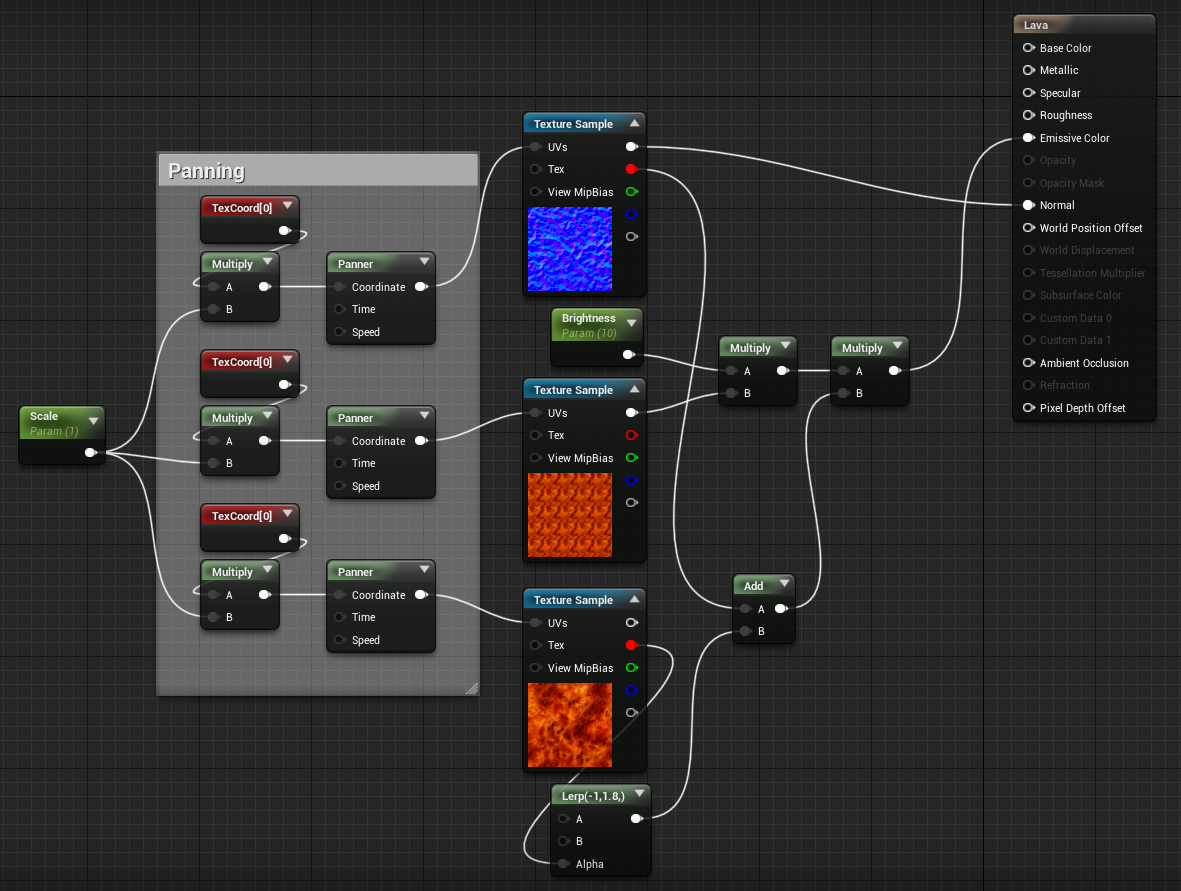
The normal map on the top is used as expected, to determine the light scattering on the surface of the object.
The middle texture is used as a base for the color emission of the lava.
The lower fire texture is panned across at the same rate as the normal map. The red colors of both are added to be used as a mask for the middle lava texture.
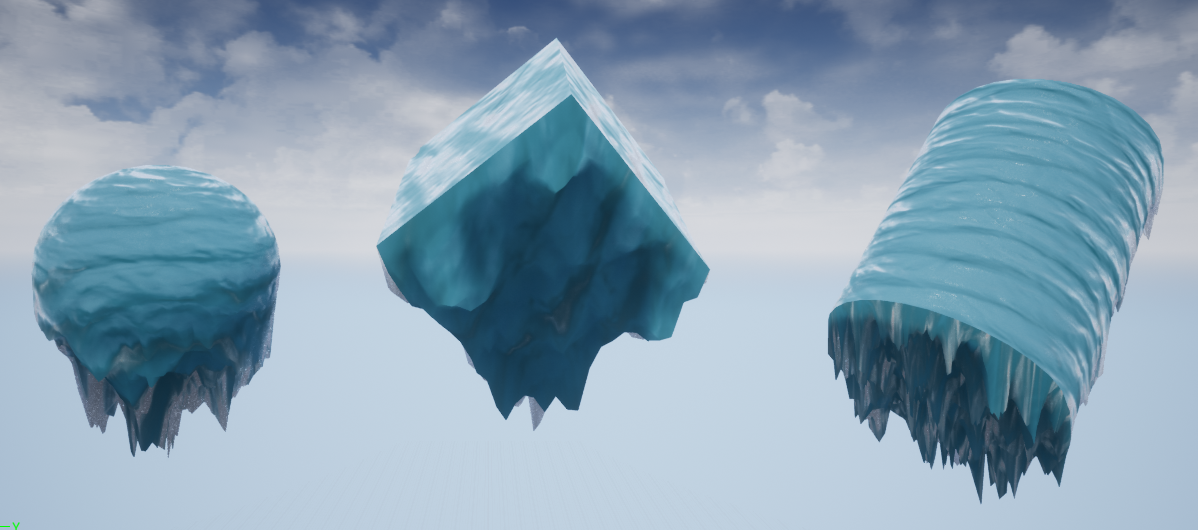
There are 2 inputs (in light green) which correspond to the scale of the shader and its brightness. The cube in the center has its brightness turned up as an example.
Ice
This is an awesome ice shader which has a nice blueish shimmer and icicles which are added dynamically.
This ice shader uses a randomized base color, randomized roughness (to make it appear imperfect / rocky), a combination of rock and sand as a normal map and a vertex shader to create icicles on the bottom.
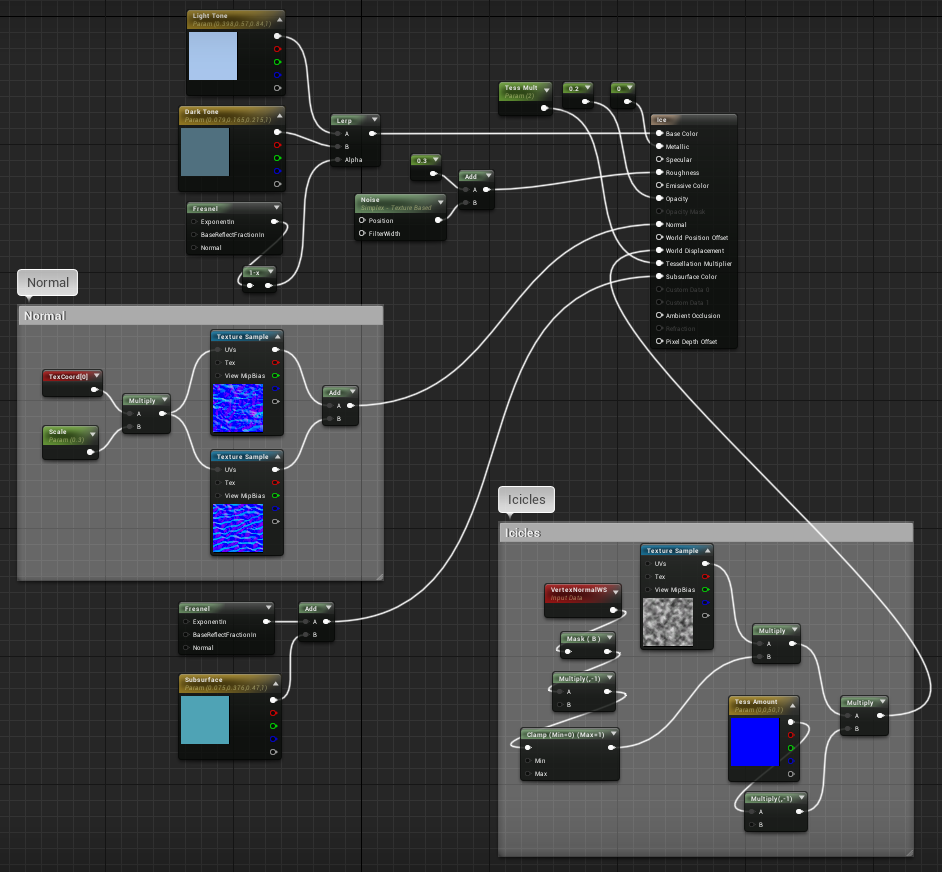
The base color is a mix between lighter and darker blue. The mix is controlled by the fresnel which creates a lighter blue on the edges.
The roughness is a noise mapped to the surface. This creates a variance in roughness which makes certain sections appear as though they are melting.
The normal map section takes in a scale and maps the current coordinate to the texture.
For the icicles, we map a noise pattern to the bottom of the object and pull the vertices down depending on the noise’s value.
Finally, the subsurface is a light blue which goes to white on the edges (controlled by another fresnel).
Outline
The purpose of this outline shader is to force partially hidden objects to still be visible using an outline.
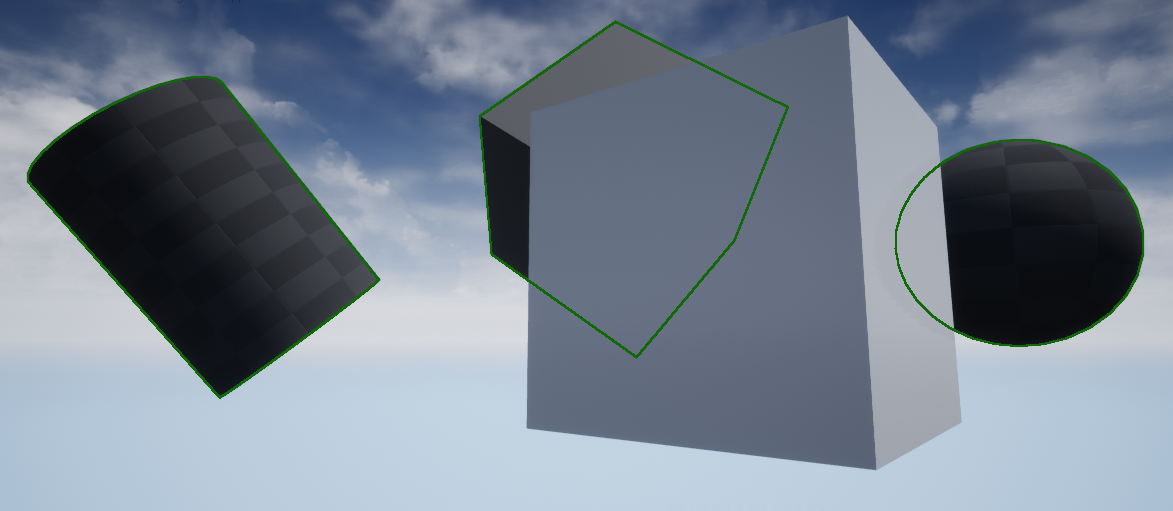
This shader also has additional parameters to control line thickness and color of the outline. Additionally, with a small tweak, can be made to only render outlines for the section of the hidden object.
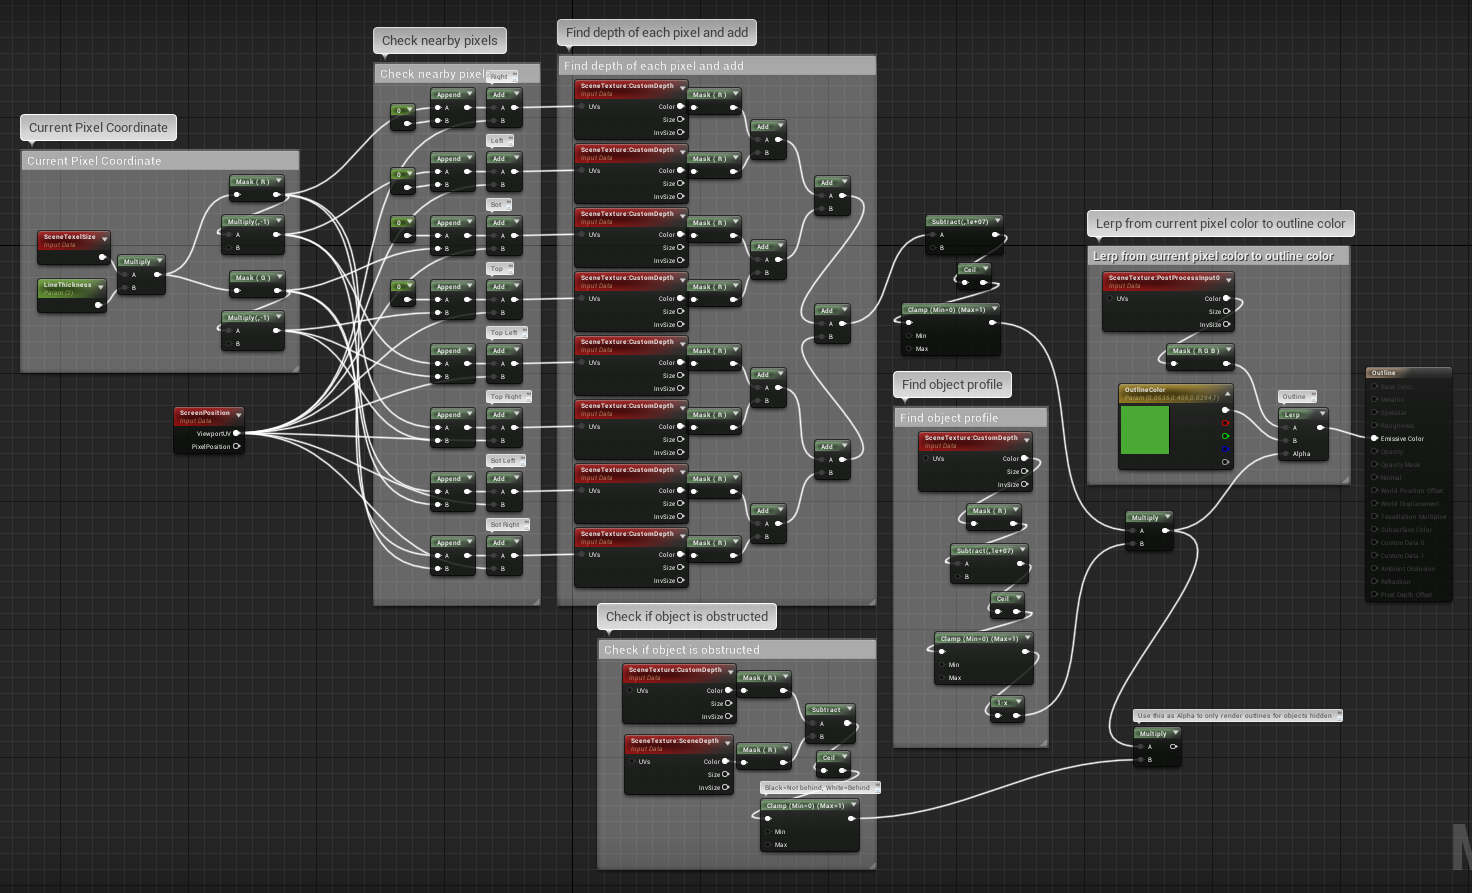
On a high level, this shader checks pixels which are not a part of the object. It looks at those pixel’s neighbors for the object. If at least one of those nearby pixels is a part of the object, it will render that pixel in the outline color.
First up, on the left we calculate the current pixel position’s x and y coordinates.
Next, we find the coordinates of that pixel’s neighbors by adding:
(x, 0), (-x, 0), (0, y), (0, -y)
(x, y), (-x, y), (x, -y), (-x, -y)
where x and y are the distance to check in a given direction.
Now we find the depth of all of those neighbor pixels - this basically returns > 100 for pixels with the object and < 10 for other pixels. In other words, we now have a value for every pixel which represents how many of those pixel’s neighbors are a part of the object.
We make this number nicer to work with by subtracting 100 (ignoring the units) and clamping the result between 0 and 1. We now have a number which will always be 1 when a pixel’s neighbors are a part of the object and 0 otherwise.
This isn’t yet an outline because all the pixels of the object will also have their value’s set to 1. In other words, we need to multiply out the pixels which are a part of the object itself, leaving only the outline.
The bottom box has an additional check for if that pixel is obstructed by something. This allows the shader to only display outlines of the obstructed sections of the object. I don’t use this functionality.
Finally, we set every pixel to a color based on its current color and the outline color. This decision is made with a lerp based on that pixel’s value. In other words, we now have an outline of the object!